How Hard Enamel Lapel Pins Are Made
Share
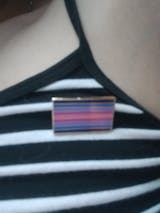
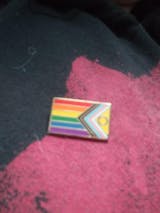
You've probably spotted those shiny little badges people wear on their jackets, backpacks, or beanies. They're called hard enamel lapel pins, and while they might look simple, making them is actually a pretty cool process that involves some serious craftsmanship and technology.
Let's take a look at how these tiny pieces of wearable art go from an idea in someone's head to that perfect pin on your collar.
Step 1: The Design Phase
Everything kicks off with a design. Someone (maybe a graphic designer, maybe just someone with a good idea) creates the artwork for the pin. Here's the catch though, the design has to use solid, separate colours. No fancy gradients or shading like you'd see in a photo, because enamel doesn't blend the way paint does.
Think of it like a colouring book, each section needs its own distinct colour. The design is usually created using computer programs like Adobe Illustrator, which keeps all the lines sharp and clean.
Step 2: Making the Mould
Once everyone's happy with the design, it's time to make a mould. This is basically like a really precise stamp that has the pin design carved into it. The mould is usually made from steel using computer-controlled cutting machines (called CNC machines) or through a process called chemical etching.
This mould becomes the master template, it'll be used to create hundreds or thousands of identical pins.
Step 3: Stamping and Cutting Out the Pins
Now the factory takes sheets of metal (usually brass, copper, or iron) and uses that mould to stamp the design into them. When the mould presses down, it creates raised outlines where the metal lines will be and little recessed areas where the coloured enamel will sit.
After stamping, each pin gets cut out into its final shape. If it's a simple circle or square, that's easy enough. But if you've designed something more complex, like a little cactus or your favourite cartoon character, they need to use precision cutting tools to get those custom shapes just right.
At this point, your pins just look like flat bits of metal with some ridges on them. No colour yet, that comes later.
Step 4: Electroplating the Metal
Next up is electroplating, which sounds more complicated than it is. The pins get dipped into a chemical bath where electricity bonds a thin layer of another metal onto the surface. This gives those raised metal lines their final look.
Your options include:
- Gold plating – bright and flashy
- Silver or nickel - that classic metallic look
- Black nickel - dark and sleek
- Copper or antique brass - for that vintage vibe
These plated lines aren't just for looks, they act like tiny metal walls that keep different enamel colours from mixing together.
Step 5: Adding the Colour
Here's where things get interesting. Hard enamel isn't actually paint, it's finely ground glass mixed with coloured pigments. Factory workers use tiny syringes or small spoons to carefully fill each section with its colour.
The difference between hard and soft enamel is important here. Soft enamel sits lower than the metal lines and feels a bit bumpy when you touch it. Hard enamel, on the other hand, is built up in layers until it sits higher than those metal boundaries.
Step 6: Into the Oven
Once all the colours are in place, the pins go into an industrial oven and get baked at seriously high temperatures, we're talking 800 to 900 degrees Celsius. That's hot enough to melt the glass powder in the enamel, which then fuses into a rock-hard, durable surface.
Most pins go through this process several times. If your design has six different colours, workers might fill two colours, bake them, then repeat the process until all colours are locked in properly.
Step 7: The Polish
After baking, the enamel usually sits a bit higher than those metal lines. To fix this, the pins go through a grinding and polishing process that smooths everything down until the enamel is perfectly flush with the raised metal.
The result? A completely flat, glossy surface that you can run your finger across without feeling any bumps. This is what gives hard enamel pins that premium, high-quality feel that collectors love.
Step 8: Adding the Backing
On the back of each pin, a post (the pointy bit that goes through your clothing) gets soldered on. Larger pins sometimes get two posts to stop them from spinning around.
Different types of clasps can be attached:
- Butterfly clutch - the most common type you see everywhere
- Rubber clutch - more comfortable and easier on your fingers
- Magnetic backings - great for delicate fabrics
- Deluxe locking clasps - for expensive pins or serious collectors
Step 9: Quality Control
Before any pins leave the factory, each one gets inspected by hand. Workers check for problems with the plating, missing enamel, scratches, or uneven polishing. The good ones get packed up and shipped out, while any dodgy ones get recycled.
Why Hard Enamel Pins Are So Popular
Toughness: The enamel coating is seriously durable. It resists scratches and won't fade easily, even with regular wear.
Professional finish: That smooth, glass-like surface just feels premium in a way that other pins don't.
Collector appeal: Because they're built to last, hard enamel pins have become huge in fan communities, fashion circles, and limited-edition drops.
The Bottom Line
From a simple sketch on a computer screen to a perfectly crafted piece of wearable art, making hard enamel pins combines metalwork, glasswork, and design into something pretty special.
So next time you see someone sporting a shiny little badge on their denim jacket or school bag, you'll know just how much skill and technology went into creating that tiny masterpiece.


